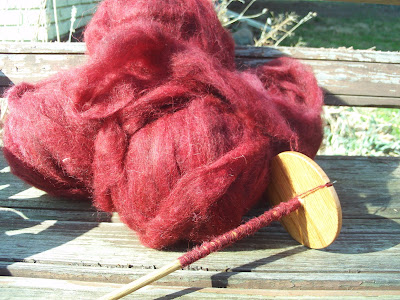
Lately I have really been into felting Knitted projects. So much so, that I have made several felted patterns and made them available on Ravelry (I still have a frog toy to write up and post though). While browsing Etsy the other day I came upon many needle felted items, mostly adorable little animals. I have a needle felting tool that my mother sent to me and I decided I really wanted to make some little needle felted animals and things.
THE HUNT FOR FIBER WAS ON!!
Well, I am visiting my parents in SC right now, and I knew that anything I purchased on Etsy probably would have to go to my house in Michigan because I was going to be heading home soon, and I am very much a "Spur of the moment" kind of crafter. Once I get something into my head, I want to do it right now and waiting around for items in the mail is NOT an option.
So I took a trip down to Hobby Lobby to look at their needle felting roving packs. They really didn't have anything of interest. While I was there my Mother wanted me to check out the baking and Cake decorating aisle for those nifty silicon muffin molds (She uses them as soap molds because they are easy to manipulate and release the soap better). Well, sadly for her, they did not have any of those silicon molds, but goodie for me, I spied some wilton gel colorings in little jars and had an epiphany!
At 1.49 each, I grabbed up 8 jars of various colors and headed to the checkout.
Once back at the parents, I pulled out about 12 oz of natural ecru fiber I had been hoarding. 4 ounces of Romney and 8oz of BFL. I pulled it into shorter lengths and soaked it in a bowl in the sink for about an hour, until it was heavy with water and there were no dry spots left.
There are numerous posts online if you do a google search for "dyeing fiber with Wilton Dyes" too many to list them all, but I really liked this one by
PieKnits.
I did not really write down measurements for this first attempt at dyeing. My goal here was to dye up the fiber I had for my own personal use, so I really just jumped right in and played around with it.
And this is what I did:
I put 3 separate saucepans on the stove top, each with 4 cups water and 1/2 cup white distilled vinegar. I brought the water and vinegar mixture to a boil and then reduced the heat to simmer.
I used a butter knife to measure out a small bit of Wilton Dye from the jar. Basically I covered about a 1/4 inch of the knife tip with dye from the jar. The dye is like a thick paste, so I mixed it with some boiling water in a small glass pyrex dish (very small custard style cup) until it was well dissolved. Then I added this color mixture to the pot of water and vinegar on the stove and stirred it in. I mixed a different color in each pot.
Now I took my bowl of soaking roving and poured it out into a colander. Then I removed each length of roving, one at a time, gently squeezing out the excess water and laying the roving on a small towel I had opened up on the kitchen counter.
Once all the roving was ready I put 1 short length into each pot. Now I just waited a few minutes, spooning the fiber up out of the water to check the saturation periodically. It really did not take more than maybe 5 - 15 minutes for the fibers to be well saturated with color. Many times the fiber would suck up all the color in the pot and the water would be clear once the fiber was removed. When that happened, I would just add more color and more wool to repeat the process. If there was color remaining in the pot when the wool was removed, I would simply place new length of wool in the pot to use up the remaining color. This is how I was able to get varying shades of the same color. As I went along, I became more confident and started mixing colors in the pot to try and achieve different shades. (I will be dyeing more fiber soon and will post detailed instructions on mixtures for the colors I achieve).
Once I spooned the fiber out of the dye pot, I would let it sit in a colander in the sink to cool for a few minutes and then I would rinse it with warm water until the water ran clear. I would gently squeeze the excess liquid from the fiber, shake it out a little bit to fluff it, and then hang it outside to dry.
And here are the results for my afternoon of dyeing fiber!

I used a little bit of the colored rovings to needle felt this little Mother Hen and her Chicks
and these 3 little piggies
And then I decided to spin up the wool I need to knit the Composed Mitts from Interweave Knits Fall 2007 Issue Here is the link to the
Composed Mitts Pattern Page on Ravelry.
These are the mini skeins I spun up last night for the bits of color.

I am still spinning the natural lt gray to use for the body of the mitts. I am currently using my US4 Addi Turbo 40 inch circular to knit the Dream Twister Socks 2 at a time, so I will have to buy another pair to knit these mitts 2 at a time.
Next post will be an update of the ongoing Toe Sock Project and more knitting WIP.
Happy Knitting, Spinning and Felting:-)

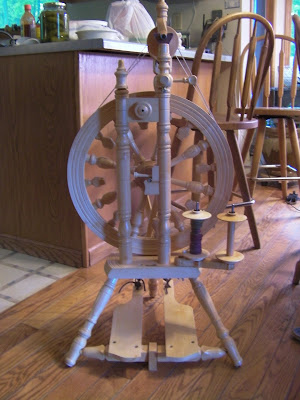
 I also purchased my first Fancy Kitty Kitten Carder. This is the fine 90/120 carder, and I also purchased an auxiliary swift in the Medium cloth as well for carding some textured art batts. I am so excited. My auxiliary swift will arrive on Monday and then I will be carding batts like crazy!
 This is my first hand dyed, hand pulled roving. I call it RARE EARTH, because when I saw the colors the first words out of my mouth were "Wow, it so earthy!" I also washed and prepped this fiber from the raw state. It is from a 80/20 Corriedale/Sussex mix breed whole fleece purchased from a local farm.
 This is the very first yarn I have spun on my new wheel. It was made using the RARE EARTH hand dyed roving. I also added in some ribbon shreds and some ribbon roses. I just love it. I know I am just going to get hooked on spinning art yarns!
 And this is the roving I used. I had 2 batches of this dyed up for a total of 4.2 ounces. The final skein is 4.4 oz and 124 grams.
  Here is the very first Batt I carded on my friend's Fancy Kitty before I purchased my own. I used the same Corriedale Sussex fiber, only this was the leftover bits from flick carding locks, and from pulling the rovings. I spun it up on my drop spindle and have not taken pics of the finished yarn yet.

 This is a pic of all the fiber I dyed that day. I dyed all this in about 30 minutes in between morning and evening service last Sunday.